Update: The guide now includes the bosses from Blackrock Spire.
Hearthstone: Blackrock Mountain includes another series of single-player fights to test your tactical abilities. The Heroic versions of these fights ramp up the difficulty considerably by giving the bosses more Health and enhancing their abilities.
This guide gives you a run-down of each Heroic fight. It gives you a run-down of each boss's abilities and how to effectively counter them. The guide also provides links to some suggested decks that will make the fight go much smoother. In general, the decks suggested are low-cost so even new Hearthstone players can take advantage of them.
Like Curse of Naxxramas, Blackrock Mountain will be released over the course of five weeks. This guide will be updated over time as more bosses become available.

Blackrock Depths
Coren Direbrew
Hero power: Pile On! (0 mana) - Put two minions from your deck and one from your opponent's into the battlefield.
CINEMABLEND NEWSLETTER
Your Daily Blend of Entertainment News
Description: Coren's strategy is to control the board and his Hero power makes this very easy. He can summon two minions for free every turn. He's got some heavy-hitters in his deck, too, including three Legendaries.
Yes, he's giving you a free minion per turn as well but he's got plenty of ways to keep your forces at bay. If he feels overwhelmed, he'll play the card "Get 'em!" to summon four 1/1 dwarves with Taunt. He's also got a pair of Brawl cards, which clear all but one minion off the board. Coren's fond of playing Brawl right after summoning Dark Iron Bouncer, a 4/8 minion guaranteed to win Brawls.
Strategy: You'll want to bring plenty of high-mana minions to the battle to take full advantage of Coren's Hero power. These minions can attack on the same turn that they're placed on the board, so Charge minions are unnecessary. Furthermore, minions summoned by Coren's Hero power won't use their Battlecry so don't let that be a factor in deciding on what cards to bring.
That's not to say you shouldn't bring spells, though. Spells that neutralize or remove Coren's minions can be a huge help. Many of these cards will be cheap enough that you can use them in the early rounds when you don't have enough mana to summon the beefy minions in your deck.
Suggested deck: Although high-mana minions are key to the fight, you don't need to own a lot of Legendaries. This Druid deck is a good example of a minion-heavy deck that doesn't cost a lot of money or dust. Another option for budget players is to skew your deck toward spells, generally as a Rogue or Priest.
High Justice Grimstone
Hero power: Jeering Crowd (0 mana) - Summon a 1/1 Spectator with Taunt.
Description: You know those rich Hearthstone players who throw Legendary after Legendary at you? High Justice Grimstone is one of them. His deck is made up of 30 Legendary minions that he'll throw at you throughout the fight. He starts at 4 mana on his first turn so he can start summoning them very early on.
Hitting these Legendaries can be tricky due to his Hero power. He creates a Spectator every turn to draw your fire. While you're occupied with them, his Legendaries will clear out your minions and smash your Hero.
Strategy: Even if you've got 30 Legendaries of your own, that's not how you're going to beat Grimstone. His Spectator makes it too hard for you to trade effectively. Thankfully, there are plenty of spell cards out there that let you take down his minions. What's more, these spells generally cost less mana than the minions you'll be using them on.
Suggested deck: Mage and Rogue decks are great at both clearing the board and hitting Grimstone in the face.
Emperor Thaurissan
Hero ability: Power of the Firelord (2 mana) - Deal 30 damage.
Description: Emperor Thaurissan is prevented from using his instant-death spell by his minion Moira Bronzebeard. She starts the fight on the board and as long as she's alive, you're safe from the spell. Keeping her alive is no easy feat, though, given her measly 1 health on Heroic.
Thaurissan's not very concerned for the well being of Moira. It's very common to lose the match because Thaurissan accidentally offed her. He has minions Abomination and Unstable Ghoul and weapon Death's Bite, all of which damage every minion on the board when destroyed.
While you're trying to keep Moira alive, she's slowly killing you. Moira has 3 attack on Heroic, so she could kill you in ten rounds on her own - assuming you're alive that long, anyway.
Strategy: Moira will only attack your minions if they have Taunt. In other words: no Taunt minions. If you want to buy yourself time, you'll want heals for your Hero instead. Buffs that increase the health of Moira can also help you stay in the fight.
Heals or not, the key to this fight is a strong offense. Minions with Charge or other Battlecry abilities are key. You want to be able to hit Thaurissan as quickly as possible
Suggested deck: A Priest deck that lets you buff and heal Moira along with your minions is a cheap and easy way to win. Mages can rely on frost magic to shield themselves or blunt Thaurissan's offense. Crazed Alchemist is a popular minion for this fight because his Battlecry lets you swap Moira to 1 attack and 3 health, giving you some valuable breathing room.

Molten Core
Garr
Hero power: Magma Pulse (1 mana) - Deal 1 damage to all minions.
Description: Garr starts out the fight with a full board. His seven starting minions are Firesworn, with no attack power. However, their Deathrattle causes 3 damage to your Hero for every Firesworn you killed that round.
The Firesworn are basically ticking time bombs. Garr uses his Hero power at the start of the turn to damage all of them. Eventually they're going to blow up in your face if you can't kill him quickly. He can also make the Firesworn hurt you before they die by buffing them with spells like Bloodlust and Rockbiter Weapon.
Strategy: This fight messes with your head a bit. Your immediate impulse when you see a horde of puny minions is to kill them all. However, there's no incentive to wiping out all of the Firesworn. The quicker you kill them, the more damage you take. Garr can quickly summon 3 more with his one Rock Out card anyway.
You have to remember that the Firesworn aren't your target. Garr is. Why spend time killing them, when he'll only replace them with more Firesworn or even stronger minion cards? You need to merely keep his little rock buddies at bay while you chip away at his health. Find ways to boost your defense or prevent Firesworn while you directly attack Garr.
Suggested deck: This fight is really a Priest's dream. They can keep the Firesworn and themselves alive with heals long enough to take out Garr. Warriors do well, too, because of class cards like Frothing Berserker and Armorsmith that benefit greatly from Garr hitting them every round with his Hero power.
Baron Geddon
Hero power: Ignite Mana (0 mana) - Deal 10 damage to the enemy Hero if they have any unspent Mana.
Description: You can tell just from the Hero Power that this isn't going to be fun. Getting hit by Ignite Mana just once might be enough to derail your attempt.
Your other big problem in this fight is a card called Living Bomb. It selects one of your minions at random and will deal 10 damage to you and the rest of your board if that minion survives your next turn. On its own, that card would be a big challenge. Along with Ignite Mana, this fight's a complete pain.
Strategy: The popular strategy on Normal mode is to simply rush him. However, that doesn't work so well on Heroic because he's got 50 health and 50 armor. You need to be less of a sprinter and more of a marathon runner.
At the same time, you don't want a lot of huge minions either. If they're too sturdy, you won't be able to remove them when they get hit with Living Bomb. You need minions powerful enough to be helpful in the battle but not so powerful that they become a liability for you.
There's not much margin for error in this fight because of how much Ignite Mana and Living Bomb cost. Success is a matter of minimizing both. You can manage Ignite Mana by having a good mana curve on your deck that ensures you'll always have some cards to play each round. Living Bomb will require you to either neutralize the affected minion or at least repair the damage it causes you.
Suggested deck: Warlocks have cheap, powerful spells that let them kill their Living Bomb minions and also maintain a steady offense against Baron Geddon. Priests, meanwhile, have Silence and Shadow Word spells to deal with Living Bomb in addition to a bevy of heals.
Majordomo Executus/Ragnaros the Firelord
Hero power: The Majordomo (2 mana) - Summon a 3/3 Flamewalker Acolyte; Die Insect (2 mana) - Deal 8 damage to a random enemy. TWICE.
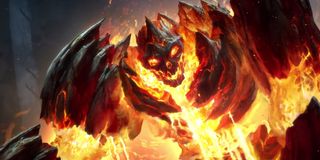
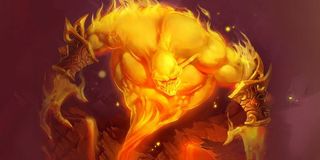
Description: Majordomo is a filthy cheater. His Hero power lets him hit the ground running by stacking the board with 3/3 minions. Then, once you've got his Health low, he'll start drawing Molten Giants. He's got 10 of them so he can fill the board with them when he's near death.
Oh, and when he does die, he's replaced by the 30 health/30 armor boss Ragnaros. He's got plenty of Molten Giants as well along with a nasty Hero Power that lets him hit two enemies for 8 damage apiece.
Strategy: Managing the transition from Executus to Ragnaros is the key challenge of this fight. You want to be able to finish off Executus's last 21 health or so as quickly as you can. This way, he plays as few Molten Giants as possible.
Ragnaros is more or less the same deal. His Heroic Power is so powerful that you need to be able to chop him down as quickly as possible. This might take a few tries, though, because his random damage could potentially knock out a minion that's essential to your killing blow.
Suggested deck: Paladins are a fun choice because you can fill the board with minions with Divine Shield. This shield will let them take a hit from Ragnaros' Hero power and survive. Bloodlust and Windspeaker make Shaman decks great at causing serious damage in one turn, while Hex lets them neutralize any stray Molten Giants.

Blackrock Spire
Highlord Omokk
Hero power: ME SMASH (0 mana) - Destroy a random enemy minion.
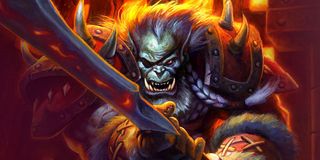
Description: Like a lot of ogres you've encountered through World of Warcraft, Omokk is all about brute force. He kills one of your minions at random at the start of the round. He then builds up his armor (he starts with 15) with the spell cards Flameheart and TIME FOR SMASH. The latter is especially worrying because it also causes 5 damage to a random enemy.
These spells put him a good position to then strike at you directly. He's got a mix of low- and medium-mana minions so he'll have strong board presence early on. He can make his bigger minions attack before you react by playing his Charge cards after summoning them. His tactics aren't complicated but he can be tough to beat if you let him get an early lead.
Strategy: There's one easy way to counter his Hero power: use a lot of cheap minions. If these minions have Charge or can boost the Attack Power of their allies, that's even better. You can also use his power to your advantage by playing cards with powerful Deathrattles.
The benefit to this aggressive strategy is that you'll be able to match him punch for punch early on. You need to be able to maintain control of the board and just as importantly keep his Armor down to manageable levels. Keep the pressure on with cheap minions (and maybe a few spells or weapons) and you'll slowly overwhelm him.
Suggested deck: This fight is so straightforward that a lot of classes would work. Aggro Paladins are an especially strong choice though because they can flood the board with cheap minions due to their Hero ability and cards like Muster for Battle. They can also buff these minions cheaply and make them very dangerous to Omokk. An alternate strategy to minimize ME SMASH is to mostly use spell cards, as this Mage deck does.
General Drakkisath
Hero power: Intense Gaze (passive) - All cards cost (1). You are capped at 2 Mana Crystals and opponent at 1.
Description: Drakkisath's Hero Power puts an interesting spin on the fight. The result of it is that you can play one card per turn for the whole fight while Drakkisath can play two. Cards like Pint-Sized Summoner or Mana Wraith that normally change the mana cost of cards won't have an effect here so don't bother with them.
As you might imagine, he's got a deck filled with really big minions to take full advantage of Intense Gaze. He also has some powerful removal spells at his disposal like Flamestrike and Kidnapper. His card Drakkisath's Command lets him destroy a minion and then give himself 10 Armor. Mindgames, meanwhile, lets him add a minion from your deck to his side of the battlefield.
Strategy: In a way, your strategy is pretty much the same as Drakkisath's. You want powerful minions along with some removal spells to keep his board clear. You just need to execute his strategy better. Pick minions that will trade well against his thanks to traits like Deathrattles or Divine Shields. Also bring cards that let you easily remove or steal his minions.
This fight can be easily lost on your starting hand. If you don't have a strong card to play right away, you might be screwed. Drakkisath can play two cards to your every one so you need to match his pace right away or this fight will get away from you quickly.
Suggested deck: This Priest deck relies on Mind Control as well as Naxxramas Legendaries to take over the board. Kel'Thuzad's ability to resurrect friendly minions every turn makes him a staple of most anti-Drakkisath decks. Rogues are another commonly used class because of their easy removals.
Rend Blackhand
Hero ability: Rend has four different Hero powers he'll use throughout the fight:
- Dismount (4 mana) - Summon Gyth. Get a new Hero Power.
- Blackwing (1 mana) - Summon a 5/4 Dragonkin. Get a new Hero Power.
- Old Horde (2 mana) - Summon two 2/2 Orcs. Get a new Hero Power.
- Open the Gates (2 mana) - Summon three 2/2 Whelps. Get a new Hero Power.
Description: Rend starts out with the Open the Gates ability listed above and then randomly cycles through the others throughout the rest of the fight. Dismount's the worst of the bunch because it lets him summon an 8/8 minion. However, the basic result of all the powers is the same: it fills up his board very quickly.
His deck supplements his offense with some nasty offensive abilities like Revenge and Mortal Strike that let him quickly wipe out your minions. He also has a card called The True Warchief that lets him instantly destroy one of your Legendaries for just one mana.
Strategy: You really have to keep his minions under control. You need to wipe out as many of them as quickly as possible. Gyth in particular can't be allowed to hang around. His 8 Attack will quickly make mincemeat of you if he's got friends with him.
At the same time, you can't lean too heavily on minions of your own. Rend's too good at taking them off the board. He's got two The True Warchief cards in his deck so your shiny Legendaries probably won't last long. You'll want a healthy amount of spells or weapons to knock out Rend's minions and then take him out.
Suggested deck: A Face Hunter can match Rend's fast assault through traps, cheap minions and strong offensive spells. Doomsayer is also used to reset the board when Rend's army gets too big. Explosive Sheep from Goblins vs Gnomes are also effective for crowd control.
Staff Writer at CinemaBlend.

Joey Fatone Reveals The Best ‘It’s Gonna Be May’ Meme Features Justin Timberlake In A Game Of Thrones Spoof

A Fan Pointed Out The Way Anyone But You Separated Out Sydney Sweeney And Glen Powell's Real And Fake Romance Scenes, And It's Super Cool

Quiet On Set Docuseries Now Facing Lawsuit From Former Nickelodeon Creator Dan Schneider
Most Popular


